Good weather is well on its way, and for many people, that means doing plenty of home improvements to the external areas of the property, around the home to try and protect it against the elements. For example, you might already be taking a look at painting the outside of your house, or you might be thinking about adding a layer of protection or two to your gates and fences. In any case, now is also the time you should start thinking about house rendering.
But what exactly is house rendering? How does it benefit you and your home? When should you do it, and why? In this short article, we will take a look at the key things you need to know and will advise you on what to expect when you take on house rendering.

House rendering is a solution that many people swear by. It’s a process that’s not entirely dissimilar to cladding and painting. In fact, it probably falls somewhere neatly in between. Many people choose to render their homes to change the looks of their properties, while others will have protection on their minds.
In fact, one of the best reasons to look into home rendering is for the dual purpose it serves. Not only can it change the look of your home, it’s a great defence against some of the nastiest damp conditions likely to pervade your property during the wet months and seasons. Yes – we’re coming into summer now – but there really isn’t a better time to prepare your home with the best render available.
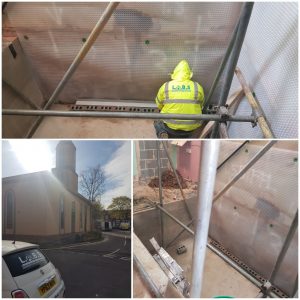
There is plenty that you can do to protect your home against potentially harmful damp conditions. Here at LABS, we’re always pleased to offer a variety of preventive solutions as well as cures. However, one of the best things you can do to set your home up in the defence of damp and mould is to get your property rendered using our specialist system consisting of an anti-crack mesh, with a vast array of colour to choose from .
Rendering is great at preventing rainwater and moisture from getting into your property. Your brickwork, if you indeed have any, is likely to be more sensitive than you think when it comes to resisting wetness and damp conditions. Rainwater seeps through the tiniest and slimmest of cracks, and via capillary action. Rendering represents a fantastic preventative measure to protect your home with.
Therefore, take advantage of this damp solution which stops water penetration. That solution, of course, is house rendering – and you’re going to need to get it up and running while the weather is good, I order to be all ready for the forthcoming winter months!
LABS’ range of fantastic anti-damp services will ensure that you have plenty of protection against the rising nastiness from wet conditions. In fact, our house rendering solutions offer a fantastic anti-crack system. This means that, even if this summer we get hammered by wind and rain, your rendering will protect your home at all costs.
There’s plenty of worth in getting rendering set up and good to go during the dry season. After all, it is in the wet when you are going to need it the most. Set up a house render solution with LABS soon, and you’ll not only have access to a great-looking cover for your property, but a protective layer to stop anything nasty and irritating from getting in. Well, apart from unwanted guests, of course.
It’s time to set up house rendering sooner rather than later. Take advantage of the sunshine and set up a home rendering solution to protect you and your family against the wettest and dampest of conditions. LABS is here with some truly brilliant, flexible, and weatherproof solutions which will look great and will protect you against everything Mother nature wants to pelt us with.
Don’t let damp, mould or condensation take control of your home. Set up house rendering now and be sure to keep your property looking fantastic and protected for months and years to come. Call us on 0114 230 2865 or drop us an email to learn more whenever you are ready to go ahead!
Unfortunately, most homes are likely to fall prey to condensation at some point or another. Condensation occurs when water vapour is created, and when it builds up and saturates. You may be causing condensation through boiling kettles, or even simply hanging a few clothes out to dry. It is important to understand how to stop condensation, simply because if left untreated, it can lead to mould growth, which can lead to breathing problems.
For that reason, LABS is always here to help you find new ways to stop condensation. Here are a few tips you can use, as well as some devices and ideas which will help to cut down the moistening of your interior walls.

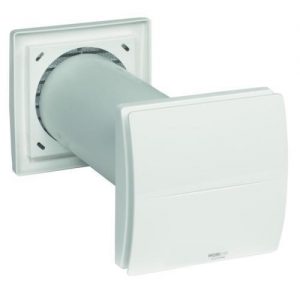 When learning how to stop condensation, you must first understand that without proper ventilation, water vapour is simply going nowhere fast. It is going to build up on walls and windows, and it could produce mould or growths that could pose health risks.
To ventilate properly, you could use extractor fan units, or you could simply choose to open a window or two more regularly during the day! Opening windows, sadly, isn’t going to cut down on the problem completely. This is especially the case when it comes to heavy condensation, or serious mould growth.
Believe it or not, condensation build up can occur as a result of problems in your building’s overall structure. This can occur in older homes where there is no efficient moisture control system in place. Modern homes shouldn’t really suffer in this regard. However, it makes sense to have your property fully inspected wherever possible.
You can look online for tell-tale signs of poor moisture control, however, it is likely going to be quicker and easier for you to ask for help from an expert who can look at a clean course of action to take. You should never try to adjust or fix structural problems in your home on your own.
DPC is a standard which we always recommend when it comes to fighting back against moisture and condensation. Homes built with a solid DPC in place will be better protected against moisture build-up. This means you have a frontline of defence, at least, should mould start wanting to creep up the walls.
Poor DPC systems or homes without moisture control are those which tend to date back decades, even centuries. It is a modern standard in most contemporary homes and new builds. Therefore, if your property is fairly new, you shouldn’t have much to worry about. However, it always pays to check just in case!
We understand that it can be hard to live without constant heat during the colder, wetter months. However, intense heat on a constant basis is always going to breed moisture, and therefore condensation. If you have any hope of learning how to stop condensation in your home, you are going to need to focus on finding heat in different ways. Can you work with a lower heat for a while? What about making sure your home is completely insulated?
There is no harm in making the most of your central heating. However, when left to power on at its top setting all day and all week, you may well start to see signs of condensation and mould. Try not to dry your clothes on radiators all week – hang them up in plenty of advance in cool, dry areas and they will be ready for you to iron in a day or two. That is, of course, if you can’t get your garment outside for wind drying.
One of our preferred options for reducing condensation here at LABS is a humidistat. This technology will accurately measure the humidity in your home, and will let you know when moisture levels are getting too high. It works in a similar fashion to a thermostat, in that it analyses the atmosphere and lets you know what you can expect.
You should ventilate your home if your humidistat advises that levels are particularly high. Therefore, make sure to install such a system as standard as soon as physically possible.
Want to know more about how to stop condensation in your home? Are you in need of damp-proofing for your basement or elsewhere? Come and have a quick chat with our team. Call us directly on 0114 230 2865 for friendly advice and guidance, or do email us via form if you’d like to know more about what LABS can do for you.
Tanking, also known as ‘Type A barrier protection, is a form of waterproofing typically applied to basement spaces, however it can also refer to general waterproofing. Tanking means to block water and deny it access to a structure, usually by means of applying a barrier product to spaces that are vulnerable, such as in between the wall and plasterboards or stud work. It can also be applied externally.
BS8102 is the industry accepted best practice when undertaking structural waterproofing of below ground structures. Your builder should always consult BS8102 and or engage with a specialist waterproofing company before undertaking any basement waterproofing project to ensure that everything is done to the correct standard.
BS8102 covers types A, B and C waterproofing types, and gives guidance on correct installation. Please continue reading below for more information on the different types of waterproofing systems.
Drained protection involves using an internal drainage system, which includes a perimeter drainage channel and sump pump. This system involves installing a dimpled membrane on both the walls and floor, this then allows for any moisture that is gathered behind the membrane, to fall in to the perimeter drainage system which installed around the edge of the room, from here it runs in to the sump pump chamber, whereby it is discharged externally in to a drain. This is the most common type of basement waterproofing that we do at LABS, and it is in our experience the most effective. It is also desirable, as the system is completely hidden once the walls have been boarded and skimmed, and the flooring details are finished.
At LABS we do two variations of this system. The first one, is where the client intends to use the space as a habitable area (such as a living room or kitchen.) This system is essentially the one mentioned above, whereby everything is hidden once the project is finished, habitable basements also require a means of escape from the basement such as a window (minimum size of 600mm x 900mm). The second variation is for a storage basement, which comes in at a slightly cheaper cost. This is because in this system, the membranes installed on the walls are left exposed (no plasterboards/skim), and no means of escape is required to be installed.
Waterproof concrete is only really an option on a newly built basement. It is defined as ‘Type B structural integral protection’ within the code of practice BS8102. Waterproof concrete shares similarity with ‘tanking,’ in that water is blocked out of the structure, it differs in the fact that there is no physical barrier product included (such as a membrane).
There are some criticisms leveled at waterproofing concrete, from experts in our industry. Within our industry, it is fairly commonly reported that basement systems have failed, when this type of system has been used, when it has not been installed correctly. Typically, this is due to weak points at the construction joints, when concrete is being poured.
This is completely dependent on what you intend to use the space for but can also be affected by the levels of risk that are acceptable to the client.
BS8102 states that ‘even when a site investigation indicates dry conditions, the risk of future waterlogging should still be assumed’. The majority of water that finds its way into a basement is rainfall. However, there can be other causations such as a burst water mains pipe. It is for these reasons that it is important to always consider that, whilst it may not be wet or damp now, the issue can arise fast and cause a lot of damage to structures.
It may be acceptable to take small risks and spend a little bit less on damp proofing with a very basic basement space, however if you’re planning on investing a lot of money in to your basement space, it doesn’t make sense to try and cut costs on the waterproofing measures, as materials such as plasterboards will deteriorate over time, even if they are seemingly dry.
This is purely dependent on what you intend to use the space for. What you intend to place, and or store in the area and if you intend to inhabit it. If you can answer these questions, we can help you decide and design a project appropriate to your needs.
The drained protection system that we install at LABS, actually tends to benefit both sides of the party wall, because the system relieves any potential ground water pressure, meaning that any ingress of water on both sides, will be slowed. However, this is not the case when concrete tanking systems are applied, as this tends to increase the pressure of ground water on party walls, leading to more prevalent water ingress.
Whether or not you have to serve a party wall notice depends completely on the works that are being undertaken. For example, if you are underpinning or undertaking any structural alterations, you would have to service a party wall notice. If you are simply installing a dimpled membrane, with plug fixing, you may not have to.
LABS is here to help with basement conversions, damp control and much more. Looking for a new habitable space? Thinking about pricing up a basement storage conversion? Turn to a local team of experts you can trust. Call us today on 0114 230 2865 or make sure to send us an email through our web form. We’ll get back in touch with you as soon as we can!
Mould is a major inconvenience, and can actually be dangerous to a tenant’s health, if left untended. In this blog post we will be discussing the different methods, and precautions you can take in order to prevent mould growth in your home. Whilst it is important to learn how to get rid of existing mould, it is just as important to understand how to prevent it from occurring in the first place.
Below we will list 5 tips that will help you to prevent mould growth from occurring in your property.
Moisture can be a nuisance, as it makes its way into properties very easily given the right conditions. Finding a way to eliminate moisture is a key step in the prevention of mould growth. It is important to check areas that could frequently collect water or have a build-up of condensation. Windows, fridges and crawl spaces are all popular places for water to build up, and it is in these environments that mould will start to form. It is therefore vital, that you take all measures possible to quickly dry any moisture in areas like these, and perform the proper maintenance, so that no further moisture is allowed to settle.
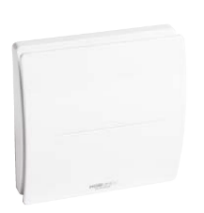
Proper ventilation of your property is also a key factor in preventing mould growth. Ventilation works to prevent humidity from gathering in the air and getting trapped in an indoor space. If left unventilated, the space will simply build up with moisture, will in turn lead to widespread mould growth. Having good airflow in essential in cutting back on the moisture level, and it will help to dry the affected areas more quickly. You can optimise the ventilation by ensuring all vents are unobstructed, as this will ensure that the air is circulating efficiently, therefore further helping to keep the spaces dry.
Mould thrives in areas of high humidity. Because humidity often causes condensation, moisture is able to settle in your property, and the dampness will take much longer to dry out, because of the wet air. If the air inside your home, is suddenly exposed to rainy and/or excessively humid conditions, there is the potential for increased mould growth. Keep an eye on moisture building up around windows, or on walls and wipe down with an absorbent cloth to prevent mould from occurring.
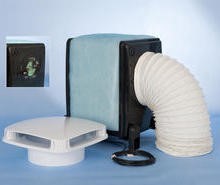
Condensation is a major player in the formation of mould growth, it is therefore important to also treat and prevent this from occurring.
The key component to condensation in the air, is excess moisture, and so it makes sense to remove as much of it as possible in order to manage the build-up of condensation. A great way to do this is to use a positive input ventilation system, which is an energy efficient method of displacing stale contaminated air and replacing it with fresh filtered air. Fresh air is drawn from outside via the loft space through a filter on the unit and delivered into a central location in your home.
This displaces vapor-laden air, which lowers humidity levels, cures condensation and eradicates mould. The unit runs continuously except when the loft temperature rises above 25°C, when the unit will switch off. When the air temperature falls below 25°C, the unit will switch back on. For more information on these systems, see our shop page at: https://l-a-b-s.co.uk/product/positive-air-vents-heat-recovery-units/
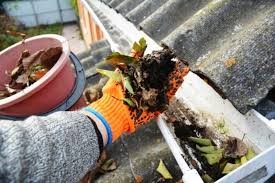
Mould problems can occur as a simple matter of a fault roof, whereby water is allowed to ingress, as a result of full or damaged gutters. It is good practice to have your gutters regularly cleaned, and inspected for damage, so that any issues can be fixed, before they become a larger issue (This is a service we can provide at LABS.) Once necessary repairs and maintenance have been carried out, it is important to keep a close look out for any water stains, that may indicate a leak.
When you first spot damp or mould in your home, it can be tempting to leave it alone. Surely it’s just a cosmetic issue – right? Sadly not. Leaving damp walls to fester for weeks and months at a time isn’t just going to encourage the problem to grow; it’s going to potentially put your health at risk!
Yes – even the smallest of damp patches, or cluster of mould spots, will need attention as soon as possible. But why is this? And just how bad are damp walls for your health – how do you know when you’ve dealt with it completely? As experts in damp proofing for homes, LABS is always here to help. For now, however, let’s take a look at wall damp in a little more detail, so we can understand fully what we’re dealing with.
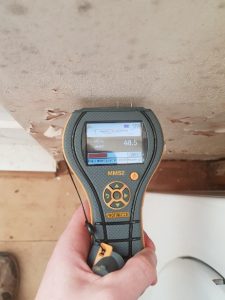 Damp walls are more than just unsightly. While you’re probably going to want to get damp and mould fixed before the problem gets any worse, there’s a chance you’re going to put you and anyone else in your home at risk. But why is this?
The answer is mould spores. Black mould spores, in particular, can thrive and grow in damp patches on all manner of surfaces in your home. Walls, in particular, are areas you should be paying close attention to. Black mould, ultimately, can prove fatal when inhaled. They are toxic to humans – which means no matter how healthy you think you are; you probably shouldn’t be taking any chances.
It’s best to get black mould attended to as soon as possible. However, there are plenty of symptoms to look out for if you’re worried that you’ve already been breathing in the spores. People who have breathed in toxic spores will have problems with breathing and even sickness. Black mould can be particularly deadly for asthma sufferers, as it can trigger attacks with very little warning.
Believe it or not, black mould can even lead to extensive illness and chronic conditions from person to person. Leaving damp walls to persist could put you and your family at risk of infection and even flu viruses. It may even lead to pneumonia if you’re not careful. If you are reasonably healthy and have a solid immune system, you probably won’t have much to worry about. However, if there are people at risk in your home, such as the very young or elderly, you are going to need to take action against damp as soon as possible.
Black mould can also cause severe lung damage over time. It can also cause a number of allergic reactions which, of course, can also prove to be deadly. Essentially, it is crucial that you identify and make arrangements for black mould to be removed safely as soon as physically possible. But how?
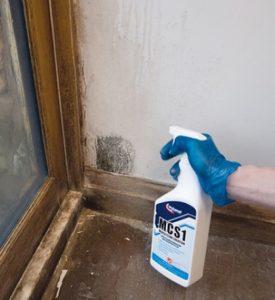 You may have seen plenty of household products on the market which promise to get rid of black mould once and for all. While some of these products – such as special paint or fungal kits – can work in some circumstances, many products available off-the-shelf are not going to be able to clear black mould and other dangerous growths as efficiently as you need them to.
Therefore, you are going to need to think about using high-grade equipment and products to make sure your damp walls can be easy remedied. Black mould can be killed with the right treatment; however, you don’t have to invest a lot of money in doing so. When opting for a worthwhile solution, there may not be any need for you to vacate, or to close off your rooms. Each case is going to be slightly different – which is why the team at LABS makes sure to be as flexible as possible when consulting with our customers.
It’s perfectly possible that you can treat and remove smaller mould spots and damp patches with household products. However, with large-scale problems, or those which have already grown black mould in spades, it’s time you thought about getting in touch with an expert.
The team at LABS works with the best equipment and industrial-grade products to safely treat and destroy mould for good. Damp walls may seem impossible to cure on your own. However, we make sure to closely identify the problems you are facing and to give damp and mould conditions the push. We always ensure to use treatments which will work as quickly and as effectively as possible, and what’s more, we will never charge over the odds for our services.
Need help with damp walls or black mould? Call the LABS team today on 0114 230 2865 or get in touch with us online to book a free consultation when you’re ready.
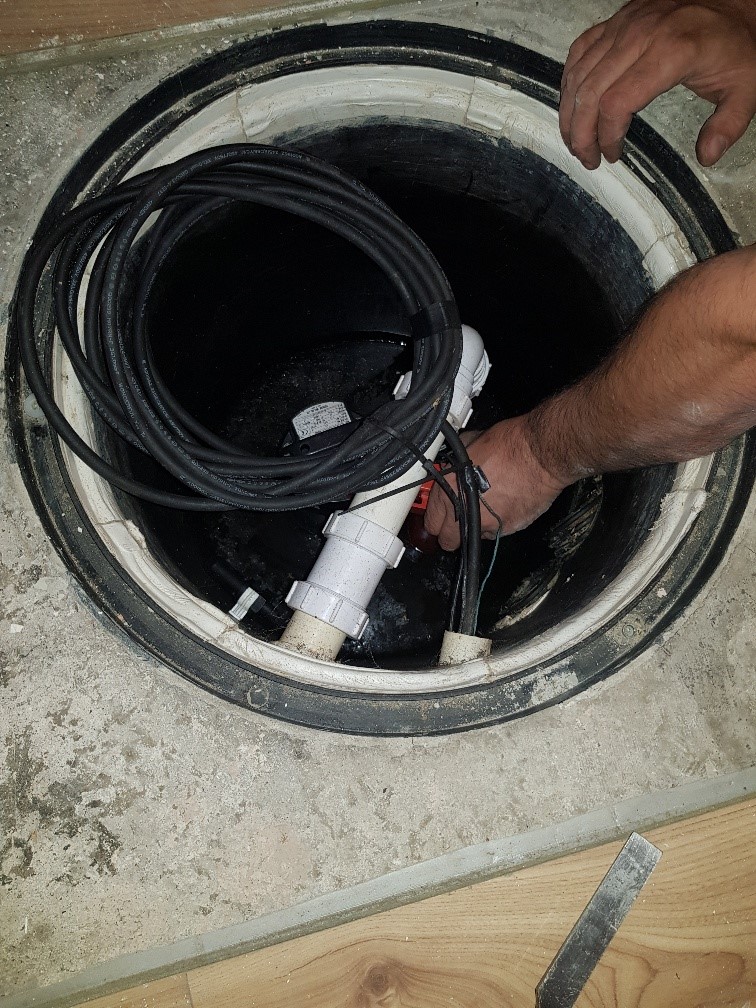 A sump pump is a major component in any home that is at risk to water ingress or flooding, it is essential in many basements in order to help rainwater/groundwater from entering. Any excess water that might have pooled up, under or around your home, will drain into a sump pump pit, which is then pumped away from the home and foundations. Just like most other appliances that might be found in your home, a sump pump needs regular maintenance in order to keep it functioning efficiently. Throughout this article we will be giving some fundamental tips which will help to ensure that your sump pump continues to function to its maximum ability.
It is important to be consistent with the maintenance for your pump, in order to minimise the chance of your home flooding. It is advisable to call out a professional in order to do this maintenance, but there are some simple steps you can take to improve the systems functionality.
• Flush the system with water three to four times a year, in order to remove any debris and residue that might have built up.
• Make sure that the float is unobstructed and can move smoothly without resistance (otherwise it may fail to activate when the water level gets too high).
• Visually scan the pit, and remove any debris, stones or mud.
• Test the pump by slowly pouring a bucket of water into the system, and ensure that the float rises alongside the water level, triggering the pump to start discharging.
• Water should be discharging away from the buildings and its foundations.
• It is advisable to disconnect the pump from the power source, and remove the unit.
• You should also replace the backup battery every two to three years.
With there being a variety of different sump pump systems, it is often a good idea to consult your manual for the manufacturer’s instructions on maintenance and schedules. However, it is advisable to follow the following schedule for maintenance:
• Monthly: If your sump pump is connected to, and disposing of water from a basement regularly, a monthly cleaning out of the pump screen and inlet is advisable. You should disconnect the pump from the power supply before cleaning, and ensure its plugged back in once completed.
• Quarterly: If your sump doesn’t dispose of water regularly, then the screen could be cleaned every-one, to three months.
• Annually: You should remove the sump pump, and clean both the pump and kit, at least once a year to ensure its functioning effectively and efficiently.
A professional inspection of your sump pump system annually will help to ensure that it is working properly, and also prolong the pumps lifespan in the long run. Contact LABS Basements and Damp Proofing, for further info on getting a service booked in.
If any of these problems occur, it is important for you to call a professional to come out and look at the system. Damage that can be done by a failed pump, could cost ten times as much as it would have been to fix the system earlier in its life cycle, therefore it is very important that you keep an eye out for any of the issues arising, and contact a professional to come and fix it sooner rather than later. Here are some of the issues that could arise:
• Power failures! If your power goes out, the pump system is completely useless and could flood when the sump reaches capacity.
• The sump becoming overwhelmed, it is important to select a pump system that will fit your requirement for water discharge. Selecting a cheap pump, with low capacity, might only lead to further costs if the pump is unable to keep up with the amount of water it has to discharge, and could even flood.
• A stuck sump pump switch
• Water freezing during cold periods, can cause blockages to the system, which would result in a flood if the issue is left unattended.
• Old age, the life cycle of a pump is around five to seven years, and it is advisable to replace them in this time frame to ensure that the system works to its maximum efficiency. An older pump might even fail without warning, which could result in a flood.
If you’re running in to any of these issues, or think you might have a problem with your sump pump, then the experts at LABS are on call! We’re here to give you our expert opinion, no sales pitch. Call LABS Building Services today on 0114 2302865 for any issues relating to your pump system or plumbing.
We at LABS basements and damp proofing would like to share some of our top tips on how to spot damp walls, and the different types of damp that could be present.
Rising damp is perhaps the most commonly known form of damp that might affect your home. It tends to occur in older buildings, with no adequate damp proof course (DPC), when groundwater rises up through porous materials, such as the bricks and mortar that make up your walls.
A common signature of rising damp is a clearly defined band of dampness, starting at your floor and moving upwards, this will often cause your paint to start flaking, or wallpaper to peel. Damp walls that are caused by rising damp can also result in other symptoms such as:

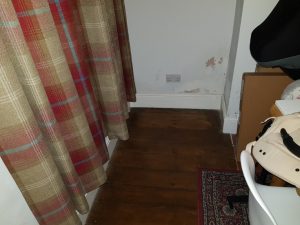
These pictures show typical signs of rising damp and damp walls. The picture on the left picture shows moisture readings indicative of rising damp, along with visual signs such as the blistered plaster work. The picture on the right shows what a wall affected by rising damp might look like.
Penetrating damp occurs when water manages to find its way inside a property from the exterior. This can happen in a number of ways, such as ingressing through walls, windows, and door fittings. penetrating damp is more likely to arise as a problem in older properties, or those located by the sea or in open areas that are open to the elements. It is key to identify penetrating damp as quickly as possible otherwise it may evolve in to a larger issue, such as a rot infestation, or contaminated plaster.
Whilst some of the symptoms of penetrating damp, are similar to those of rising damp, the key differential between the two is usually found in the structural factors. Penetrating damp tends to occur as a result of structural issues, such as a failing guttering system, faulty roofing, or cracks and holes in external walls. Penetrating damp is one of the most common causes of damp walls.
These are some telling signs of penetrating damp
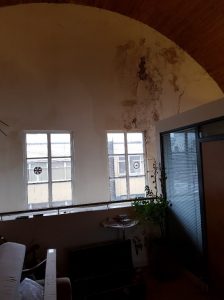
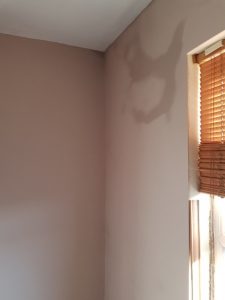
Importantly dampness around the chimney can be often misdiagnosed as a problem with the chimney stack. More often than not this problem can be attributed to the fossil fuel residue left by coal, coal contains salt minerals such as nitrates, chlorides and sulphates that can migrate from the brick work through to the plaster finish. When in the plaster finish, these salts draw moisture from the environment to them and will show up with wet patches with no uniformity in presentation.
The problems with damp chimney walls are alleviated in a similar fashion to other damp problems. chimneys are also prone to other causes of dampness, such as; open or broken chimney pots, poorly-constructed chimney stack/lead fleshing, ventilation and cracked mortar around the chimney stack. It is important to note that rising damp can also lead to chimney damp if left untreated.
Here are some ways to tell if you have a chimney damp problem, and these can be at any section of the chimney breast throughout a given property.

This picture shows a clear damp patch just below the dado decorative rail.